2.4 - 实现鼠标摄像机控制
在这步中,我们将实现鼠标控制角色四处查看的功能。
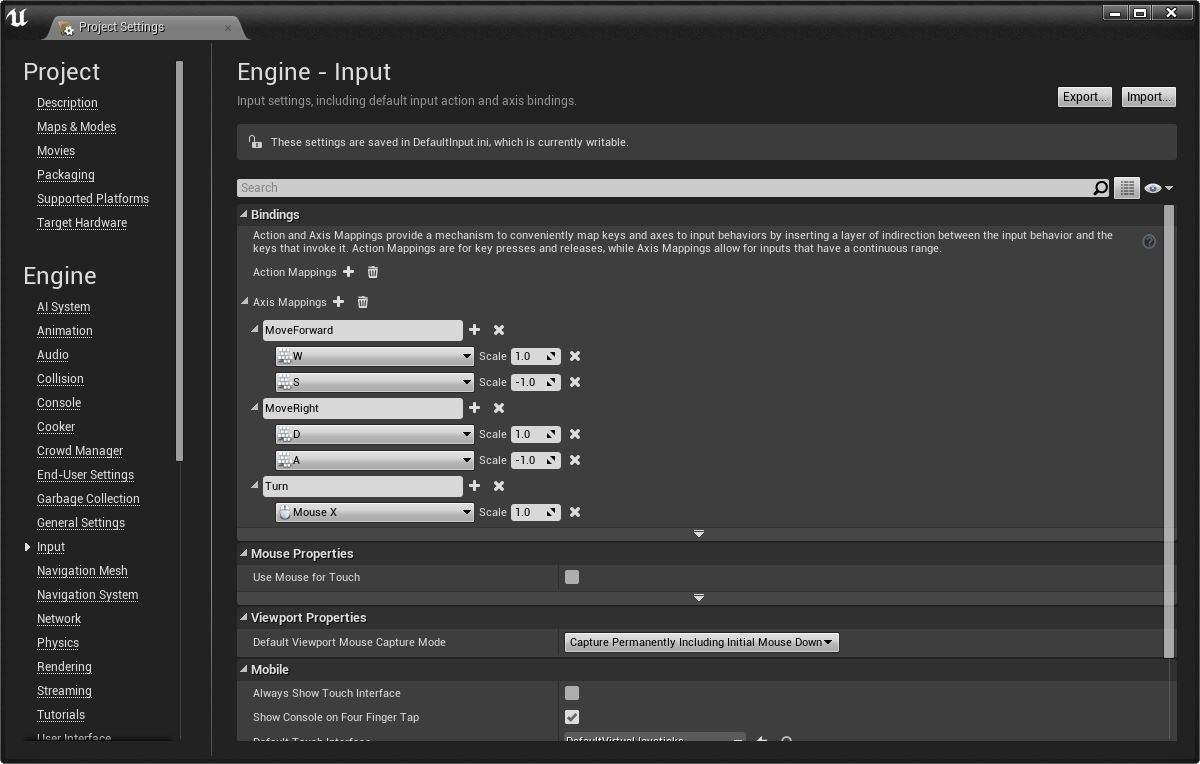
转动轴映射
在 Edit 菜单中点击 Project Settings。
在 Project Settings 标签左侧的 Engine 标题下点击 Input。
在 Bindings 下点击 Axis Mappings 旁的加号。
点击 Axis Mappings 左侧的箭头。
在出现的文本框中输入“Turn”,然后点击文本框左侧的箭头展开轴绑定选项。
在下拉菜单中,从 Mouse 下拉列表中选择 Mouse X。
输入设置应与下图相似:
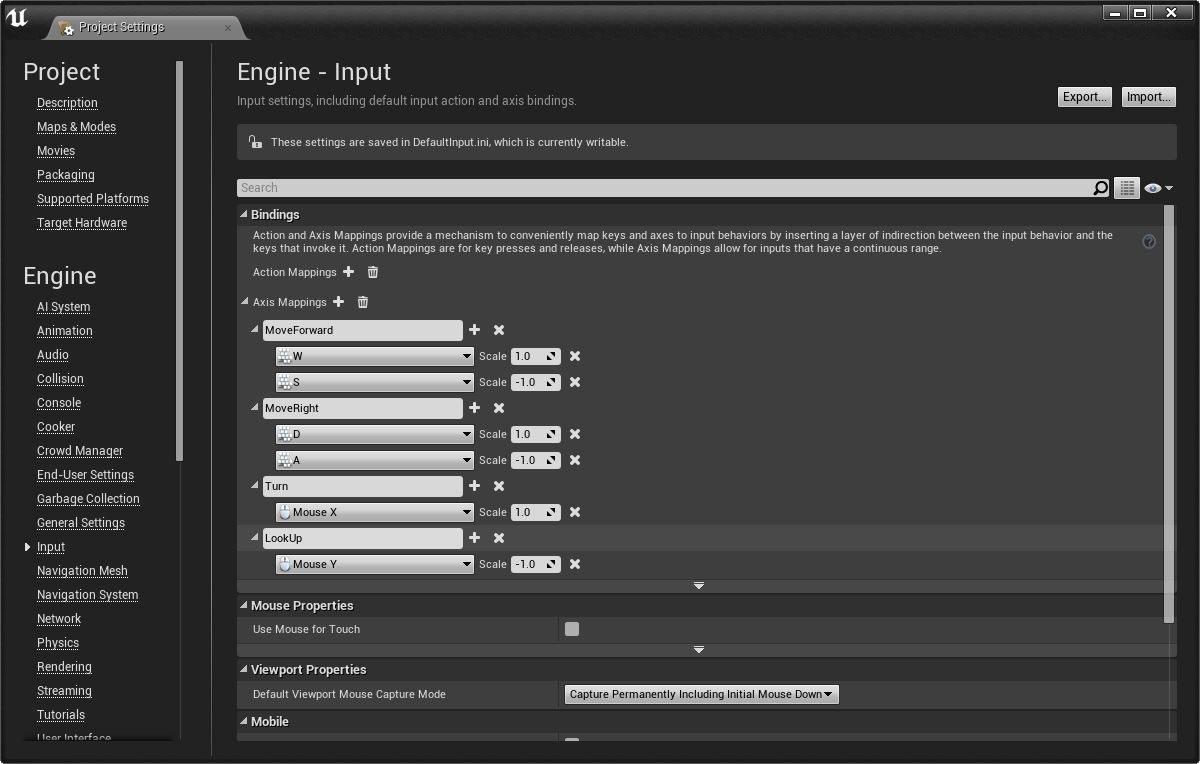
仰视轴映射
在 Bindings 下点击 Axis Mappings 旁的加号。
在出现的文本框中输入“LookUp”,然后点击文本框左侧的箭头展开轴绑定选项。
在下拉菜单中,从 Mouse 下拉列表中选择 Mouse Y。
在 Mouse Y 旁边的 Scale 框中输入“-1.0”。
输入设置应与下图相似:
关闭 Project Settings 菜单。
实现输入处理
现在即可添加代码,处理转动和仰视的鼠标输入。Character 基类定义两个必要函数:
AddControllerYawInputAddControllerPitchInput
如需执行更多处理(如添加灵敏度或轴翻转的支持),可在将输入值传递到函数前通过自定义函数对其进行调整;然而在此情形下,需要将输入直接绑定到 AddControllerYawInput 和 AddControllerPitchInput 函数。
将以下代码行添加到
FPSCharacter.cpp中的SetupPlayerInputComponent。// 设置“查看”绑定。 InputComponent->BindAxis("Turn", this, &AFPSCharacter::AddControllerYawInput); InputComponent->BindAxis("LookUp", this, &AFPSCharacter::AddControllerPitchInput);SetupPlayerInputComponent应与以下代码相似:// 调用后将功能绑定到输入 void AFPSCharacter::SetupPlayerInputComponent(class UInputComponent* InputComponent) { Super::SetupPlayerInputComponent(InputComponent); // 设置“移动”绑定。 InputComponent->BindAxis("MoveForward", this, &AFPSCharacter::MoveForward); InputComponent->BindAxis("MoveRight", this, &AFPSCharacter::MoveRight); // 设置“查看”绑定。 InputComponent->BindAxis("Turn", this, &AFPSCharacter::AddControllerYawInput); InputComponent->BindAxis("LookUp", this, &AFPSCharacter::AddControllerPitchInput); }
测试鼠标摄像机控制
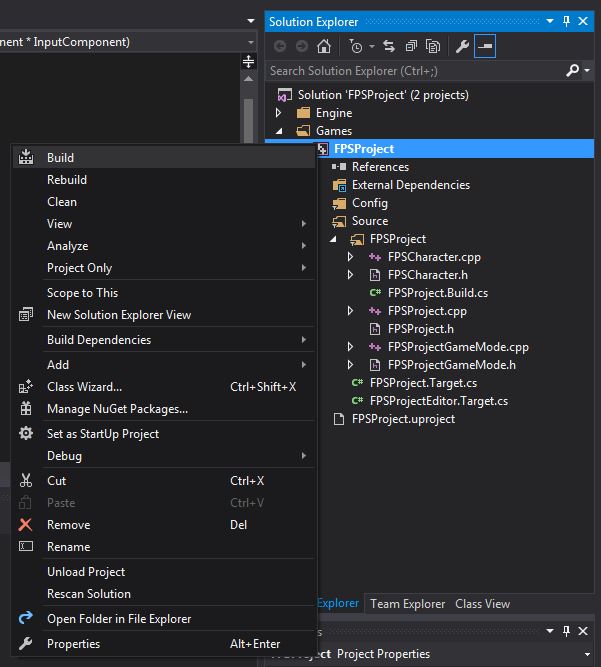
在 Visual Studio 中保存
FPSCharacter实现文件。在 Solution Explorer 中找到 FPSProject。
右键单击 FPSProject 并选择 Build 编译项目。
构建完成后,在虚幻编辑器中打开 FPSProject。
点击关卡编辑器工具栏中的 Play 按钮。现在即可使用鼠标控制摄像机。
按下 Esc 键或点击关卡编辑器中的 Stop 按钮即可退出 Play in Editor(PIE)模式。