3.2 - 实现射击
在这步中,我们将实现 OnFire 函数,使角色能够发射物体。
实现 OnFire 函数
在 Solution Explorer 中找到
FPSCharacter类 CPP 文件并打开FPSCharacter.cpp。在
FPSCharacter.cpp上方添加以下#include。#include "FPSProjectile.h"将以下
Fire函数定义添加到FPSCharacter.cpp。void AFPSCharacter::Fire() { // 尝试发射物体。 if (ProjectileClass) { // 获取摄像机变换。 FVector CameraLocation; FRotator CameraRotation; GetActorEyesViewPoint(CameraLocation, CameraRotation); // 将 MuzzleOffset 从摄像机空间变换到世界空间。 FVector MuzzleLocation = CameraLocation + FTransform(CameraRotation).TransformVector(MuzzleOffset); FRotator MuzzleRotation = CameraRotation; // 将准星稍微上抬。 MuzzleRotation.Pitch += 10.0f; UWorld* World = GetWorld(); if (World) { FActorSpawnParameters SpawnParams; SpawnParams.Owner = this; SpawnParams.Instigator = Instigator; // 在枪口处生成发射物。 AFPSProjectile* Projectile = World->SpawnActor<AFPSProjectile>(ProjectileClass, MuzzleLocation, MuzzleRotation, SpawnParams); if (Projectile) { // 设置发射物的初始轨道。 FVector LaunchDirection = MuzzleRotation.Vector(); Projectile->FireInDirection(LaunchDirection); } } } }FPSCharacter.cpp应与以下代码相似:// 在 Project Settings 的 Description 页面填入版权声明。 #include "FPSProject.h" #include "FPSCharacter.h" #include "FPSProjectile.h" // 设置默认值 AFPSCharacter::AFPSCharacter() { // 设置此角色每帧调用 Tick()。不需要时可将此关闭,以提高性能。 PrimaryActorTick.bCanEverTick = true; // 创建一个第一人称摄像机组件。 FPSCameraComponent = CreateDefaultSubobject<UCameraComponent>(TEXT("FirstPersonCamera")); // 将摄像机组件附加到胶囊体组件。 FPSCameraComponent->AttachTo(GetCapsuleComponent()); // 将摄像机放置在眼睛上方不远处。 FPSCameraComponent->SetRelativeLocation(FVector(0.0f, 0.0f, 50.0f + BaseEyeHeight)); // 用 pawn 控制摄像机旋转。 FPSCameraComponent->bUsePawnControlRotation = true; // 为拥有玩家创建一个第一人称模型组件。 FPSMesh = CreateDefaultSubobject<USkeletalMeshComponent>(TEXT("FirstPersonMesh")); // 该模型仅对拥有玩家可见。 FPSMesh->SetOnlyOwnerSee(true); // 将 FPS 模型添加到 FPS 摄像机。 FPSMesh->AttachTo(FPSCameraComponent); // 禁用部分环境阴影,保留单一模型存在的假象。 FPSMesh->bCastDynamicShadow = false; FPSMesh->CastShadow = false; // 拥有玩家无法看到普通(第三人称)身体模型。 GetMesh()->SetOwnerNoSee(true); } // 游戏开始时或生成时调用 void AFPSCharacter::BeginPlay() { Super::BeginPlay(); if (GEngine) { // 显示调试信息五秒。-1“键”值(首个参数)说明我们无需更新或刷新此消息。 GEngine->AddOnScreenDebugMessage(-1, 5.0f, FColor::Red, TEXT("We are using FPSCharacter.")); } } // 每帧调用 void AFPSCharacter::Tick( float DeltaTime ) { Super::Tick( DeltaTime ); } // 调用后将功能绑定到输入 void AFPSCharacter::SetupPlayerInputComponent(class UInputComponent* InputComponent) { Super::SetupPlayerInputComponent(InputComponent); // 设置“移动”绑定。 InputComponent->BindAxis("MoveForward", this, &AFPSCharacter::MoveForward); InputComponent->BindAxis("MoveRight", this, &AFPSCharacter::MoveRight); // 设置“查看”绑定。 InputComponent->BindAxis("Turn", this, &AFPSCharacter::AddControllerYawInput); InputComponent->BindAxis("LookUp", this, &AFPSCharacter::AddControllerPitchInput); // 设置“动作”绑定。 InputComponent->BindAction("Jump", IE_Pressed, this, &AFPSCharacter::StartJump); InputComponent->BindAction("Jump", IE_Released, this, &AFPSCharacter::StopJump); InputComponent->BindAction("Fire", IE_Pressed, this, &AFPSCharacter::Fire); } void AFPSCharacter::MoveForward(float Value) { // 明确哪个方向是“前进”,并记录玩家试图向此方向移动。 FVector Direction = FRotationMatrix(Controller->GetControlRotation()).GetScaledAxis(EAxis::X); AddMovementInput(Direction, Value); } void AFPSCharacter::MoveRight(float Value) { // 明确哪个方向是“向右”,并记录玩家试图向此方向移动。 FVector Direction = FRotationMatrix(Controller->GetControlRotation()).GetScaledAxis(EAxis::Y); AddMovementInput(Direction, Value); } void AFPSCharacter::StartJump() { bPressedJump = true; } void AFPSCharacter::StopJump() { bPressedJump = false; } void AFPSCharacter::Fire() { // 尝试发射物体。 if (ProjectileClass) { // 获取摄像机变换。 FVector CameraLocation; FRotator CameraRotation; GetActorEyesViewPoint(CameraLocation, CameraRotation); // 将 MuzzleOffset 从摄像机空间变换到世界空间。 FVector MuzzleLocation = CameraLocation + FTransform(CameraRotation).TransformVector(MuzzleOffset); FRotator MuzzleRotation = CameraRotation; // 将准星稍微上抬。 MuzzleRotation.Pitch += 10.0f; UWorld* World = GetWorld(); if (World) { FActorSpawnParameters SpawnParams; SpawnParams.Owner = this; SpawnParams.Instigator = Instigator; // 在枪口处生成发射物。 AFPSProjectile* Projectile = World->SpawnActor<AFPSProjectile>(ProjectileClass, MuzzleLocation, MuzzleRotation, SpawnParams); if (Projectile) { // 设置发射物的初始轨道。 FVector LaunchDirection = MuzzleRotation.Vector(); Projectile->FireInDirection(LaunchDirection); } } } }在 Visual Studio 中保存
FPSCharacter.cpp。在 Solution Explorer 中找到 FPSProject。
右键单击 FPSProject 并选择 Build 编译项目。

构建发射物蓝图
从以下链接下载并提取样本模型,然后继续: “发射物模型”
在 Content Browser 文件框中单击右键打开 Import Asset 对话框。
点击 “Import to /Game...” 打开 Import 对话框。
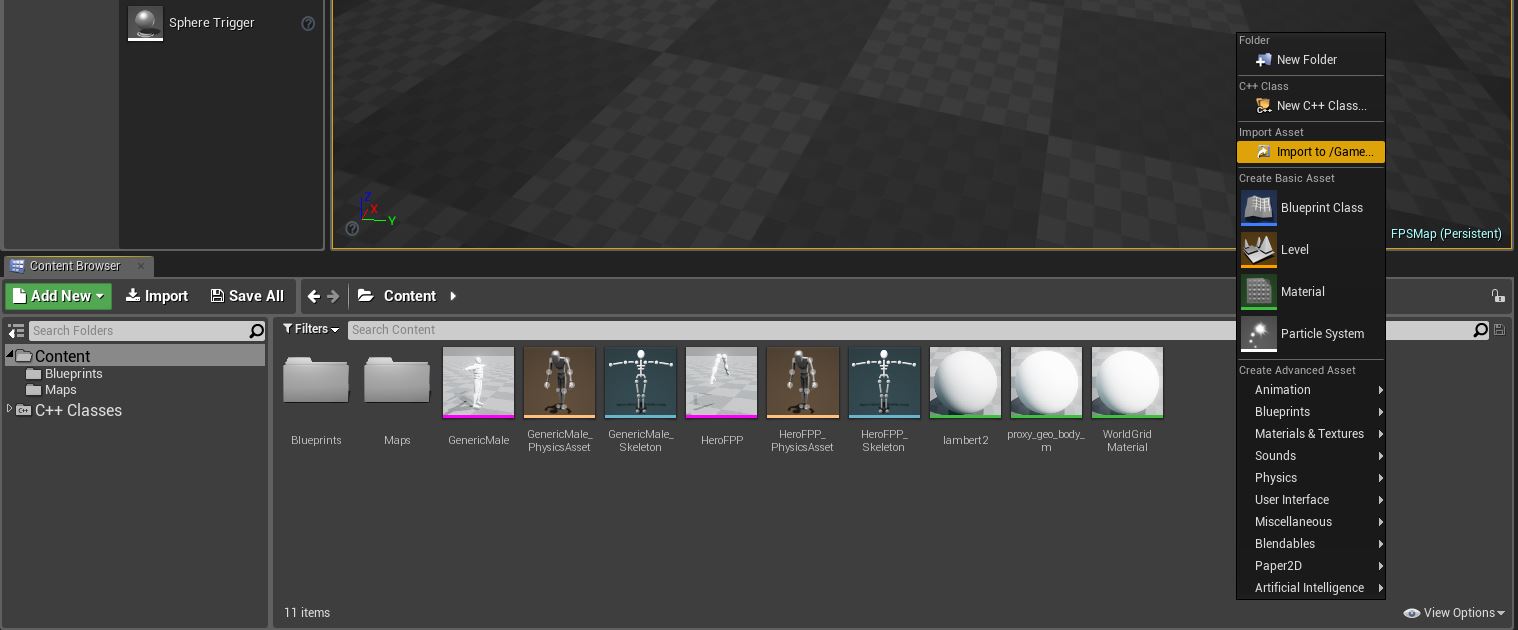
找到并选择 Sphere.fbx 模型文件。
点击 Open 开始导入模型到项目。
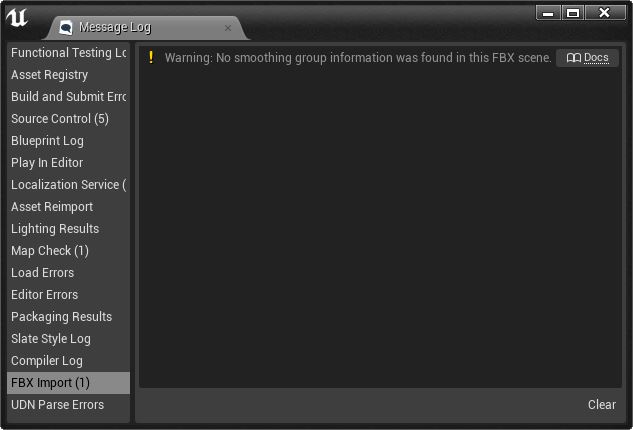
FBX Import Options 对话框将出现在 Content Browser 中。点击 Import 将模型添加到项目。
忽略以下关于平滑组的错误:
点击 Save 按钮保存导入的静态模型。
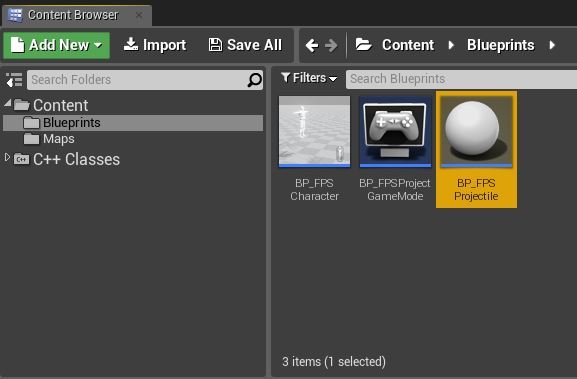
返回 Content Browser 中的 Blueprints 文件夹。
点击 Add New 按钮并选择 Blueprint Class。
展开 All Classes 下拉菜单并在搜索框中输入“FPSProjectile”。
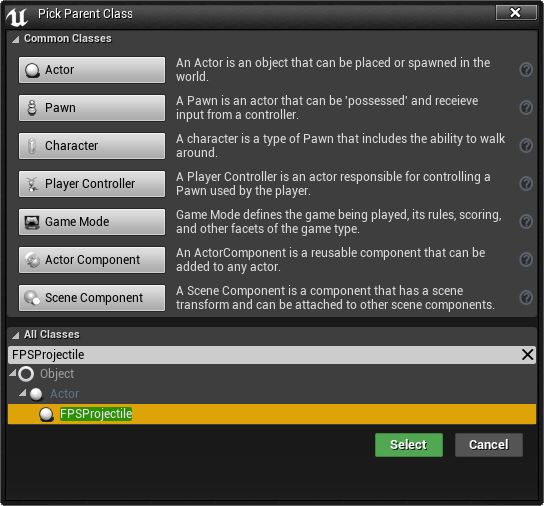
点击 FPSProjectile,再点击 Select 按钮。
将新蓝图命名为“BP_FPSProjectile”。
双击 BP_FPSCharacter 图标将其在 蓝图编辑器 中打开。
在 Components 标签中点击 CollisionComponent。
点击 Add Component 下拉列表并选择 Static Mesh。
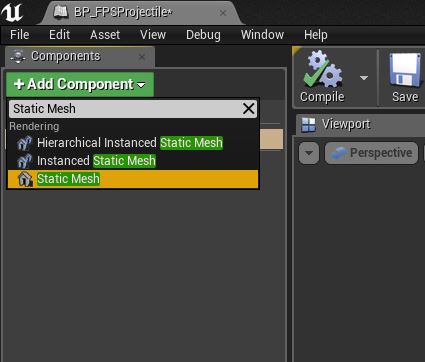
将新组件命名为“ProjectileMeshComponent”。

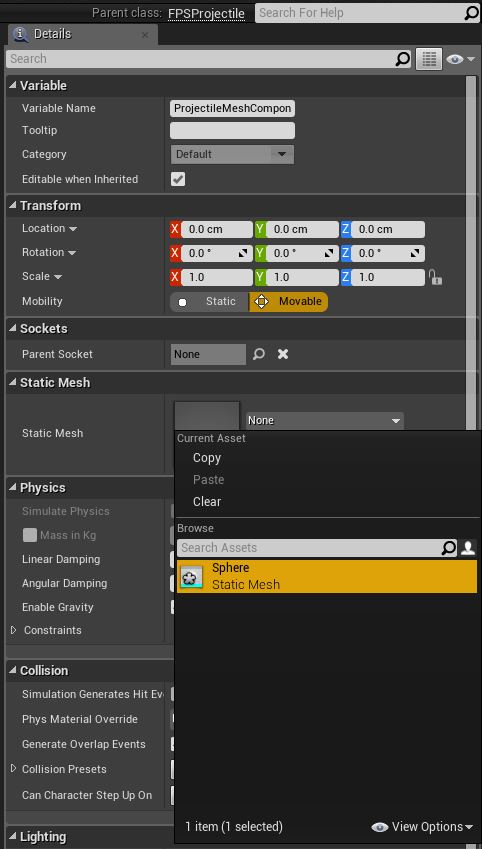
向下滚动到 Details 标签的 Static Mesh 部分,点击显示为“None”的下拉菜单。
选择 Sphere 静态模型。
注意:如开发的是多人游戏,还需要在“MovementComp”组件中取消勾选“Initial Velocity in Local Space”,使该发射物在服务器上正确复制。
将 X、Y 和 Z 轴的缩放值设为“0.09”。
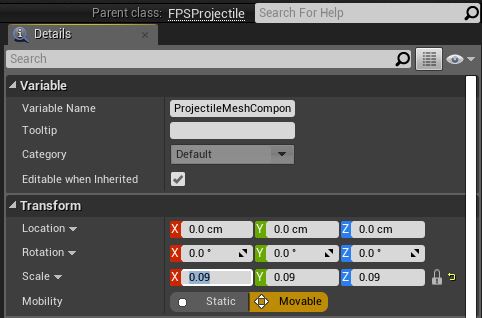
点击锁图标将三个轴锁定,使它们之间保持相对缩放。
将
ProjectileMeshComponentCollision Presets 值设为 NoCollision(因为使用的是SphereComponent进行碰撞,而不是该静态模型)。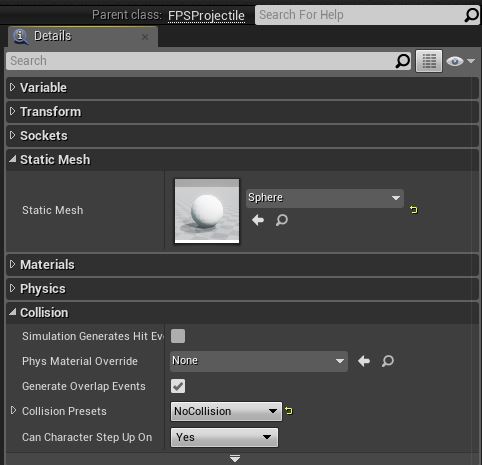
关闭 蓝图编辑器 之前 编译 并 保存 蓝图。
双击 BP_FPSCharacter 打开角色蓝图进行编辑。
打开 Class Defaults Mode。
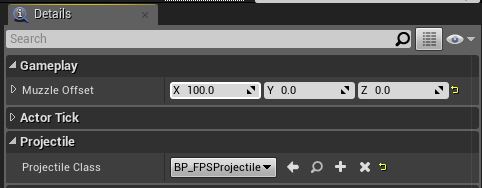
找到 Projectile Class 属性,将其设为 BP_FPSProjectile。
将 MuzzleOffset 属性设为 {100, 0, 0},在摄像机略微靠前的位置生成发射物。
关闭 蓝图编辑器 之前 编译 并 保存 蓝图。
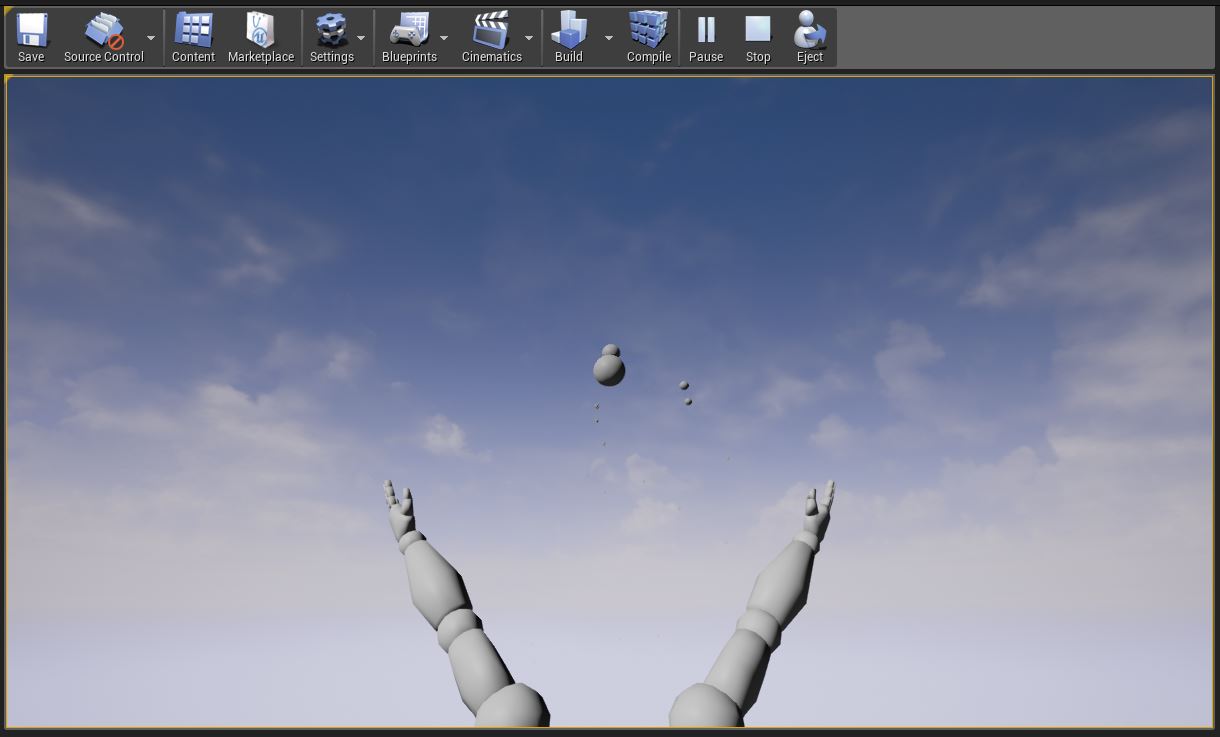
在游戏中进行射击
点击 关卡编辑器工具栏 中的 Play In 按钮在游戏中进行射击。
点击鼠标左键将发射物发射到世界场景中。
按下 Esc 键或点击关卡编辑器中的 Stop 按钮即可退出 Play in Editor(PIE)模式。