2.3 - 实现角色移动函数
在这步中,我们将设置角色输入组件并在 FPSCharacter 类中实现以下函数:
MoveForwardMoveRight
移动函数接口
为 FPSCharacter 设置轴映射后,即可切换到 Visual Studio 的项目中。
在
FPSCharacter.h中,在SetupPlayerInputComponent下添加以下函数声明。// 处理前后移动的输入。 UFUNCTION() void MoveForward(float Value); // 处理左右移动的输入。 UFUNCTION() void MoveRight(float Value);UFUNCTION宏(位于这些函数之上)使引擎了解这些函数,以便将它们加入序列化和其他引擎功能。FPSCharacter.h应与以下代码相似:// 在 Project Settings 的 Description 页面填入版权声明。 #pragma once #include "GameFramework/Character.h" #include "FPSCharacter.generated.h" UCLASS() class FPSPROJECT_API AFPSCharacter : public ACharacter { GENERATED_BODY() public: // 设置该角色属性的默认值 AFPSCharacter(); // 游戏开始时或生成时调用 virtual void BeginPlay() override; // 每帧调用 virtual void Tick( float DeltaSeconds ) override; // 调用后将功能绑定到输入 virtual void SetupPlayerInputComponent(class UInputComponent* InputComponent) override; // 处理前进和后退的输入。 UFUNCTION() void MoveForward(float Value); // 处理左右移动的输入。 UFUNCTION() void MoveRight(float Value); };
移动函数实现
在典型的 FPS 操作方案中,角色移动轴与摄像机相对应。“向前”移动代表“向摄像机朝向的方向移动”;“向右”代表“向摄像机朝向方向的右边移动”。将使用 PlayerController 获取角色的控制旋转。此外,MoveForward 函数将无视控制旋转绕 X 轴旋转的组件并限制对 XY 平面的输入,以保证向上/向下查看时角色仍保持在地面上行走。
在
FPSCharacter.cpp中,将以下代码行添加到Super::SetupPlayerInputComponent(InputComponent)下的SetupPlayerInputComponent函数:// 调用后将功能绑定到输入 void AFPSCharacter::SetupPlayerInputComponent(class UInputComponent* InputComponent) { Super::SetupPlayerInputComponent(InputComponent); // 设置“移动”绑定。 InputComponent->BindAxis("MoveForward", this, &AFPSCharacter::MoveForward); InputComponent->BindAxis("MoveRight", this, &AFPSCharacter::MoveRight); }InputComponent是定义如何处理输入数据的组件。InputComponent可附加到需要接收输入的 actor。在
FPSCharacter.cpp中添加以下MoveForward函数定义。void AFPSCharacter::MoveForward(float Value) { // 明确哪个方向是“前进”,并记录玩家试图向此方向移动。 FVector Direction = FRotationMatrix(Controller->GetControlRotation()).GetScaledAxis(EAxis::X); AddMovementInput(Direction, Value); }在
FPSCharacter.cpp中添加以下MoveRight函数定义。void AFPSCharacter::MoveRight(float Value) { // 明确哪个方向是“向右”,并记录玩家试图向此方向移动。 FVector Direction = FRotationMatrix(Controller->GetControlRotation()).GetScaledAxis(EAxis::Y); AddMovementInput(Direction, Value); }FPSCharacter.cpp应与以下代码相似:// 在 Project Settings 的 Description 页面填入版权声明。 #include "FPSProject.h" #include "FPSCharacter.h" // 设置默认值 AFPSCharacter::AFPSCharacter() { // 设置此角色每帧调用 Tick()。不需要时可将此关闭以提高性能。 PrimaryActorTick.bCanEverTick = true; } // 游戏开始时或生成时调用 void AFPSCharacter::BeginPlay() { Super::BeginPlay(); if (GEngine) { // 显示调试信息五秒。-1“键”值(首个参数)说明我们无需更新或刷新此消息。 GEngine->AddOnScreenDebugMessage(-1, 5.0f, FColor::Red, TEXT("We are using FPSCharacter.")); } } // 每帧调用 void AFPSCharacter::Tick( float DeltaTime ) { Super::Tick( DeltaTime ); } // 调用后将功能绑定到输入 void AFPSCharacter::SetupPlayerInputComponent(class UInputComponent* InputComponent) { Super::SetupPlayerInputComponent(InputComponent); // 设置“移动”绑定。 InputComponent->BindAxis("MoveForward", this, &AFPSCharacter::MoveForward); InputComponent->BindAxis("MoveRight", this, &AFPSCharacter::MoveRight); } void AFPSCharacter::MoveForward(float Value) { // 明确哪个方向是“前进”,并记录玩家试图向此方向移动。 FVector Direction = FRotationMatrix(Controller->GetControlRotation()).GetScaledAxis(EAxis::X); AddMovementInput(Direction, Value); } void AFPSCharacter::MoveRight(float Value) { // 明确哪个方向是“向右”,并记录玩家试图向此方向移动。 FVector Direction = FRotationMatrix(Controller->GetControlRotation()).GetScaledAxis(EAxis::Y); AddMovementInput(Direction, Value); }
测试角色移动
现在即可编译并测试新实现的角色移动函数。
在 Visual Studio 中保存
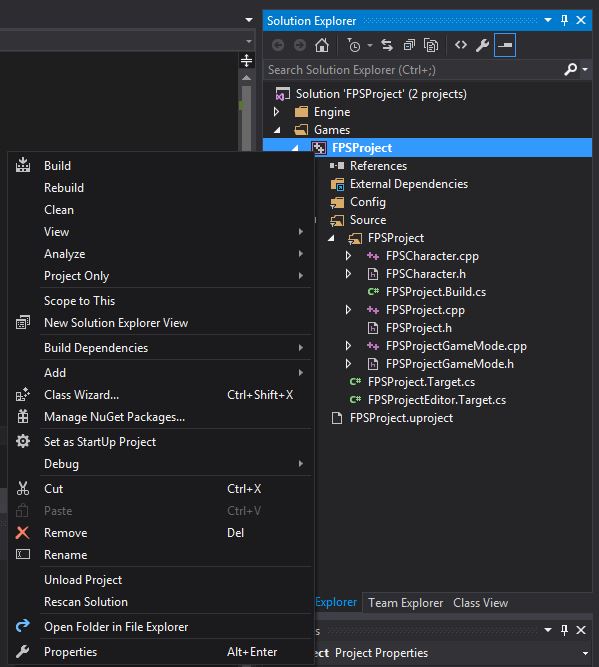
FPSCharacter头 (*.h) 和 CPP (*.cpp)文件。在 Solution Explorer 中找到 FPSProject。
右键单击 FPSProject 并选择 Build 编译项目。
构建完成后,在虚幻编辑器中打开 FPSProject。
点击关卡编辑器工具栏中的 Play 按钮。现在即可向前、向后、向左和向右移动。
按下 Esc 键或点击关卡编辑器中的 Stop 按钮即可退出 Play in Editor(PIE)模式。